Wix vs. WordPress
May 6, 2026

WordPress everywhere – and it’s no coincidence! You can find millions of websites on the World Wide Web that have been created with the open-source software, WordPress. As already mentioned at the beginning, it is the number 1 CMS system for users. Oh, and by the way… CMS is the common abbreviation for “content management system”, the software you generally need to build a website.
In addition to WordPress, there are also strong competitors such as Pimcore or Typo 3, but WordPress has prevailed in terms of popularity for years for three reasons: Firstly, it’s free, so users aren’t forced to invest huge sums of money before designing the website. No further training or professional training is necessary, as the CMS is easy to use. There are a wide range of functions available and most of them are self-explanatory, which underlines the user-friendliness of the software. And if you do happen to have any questions, you can always turn to the WordPress community – one of the largest on the IT market, which designed the CMS and is constantly working to develop it further.
Now you’ve gotten to know WordPress a little better. We are now ready for the first big step towards your own homepage! However, before you install the software, you need to check off the most important to-do for the framework of your website and that’s choosing a web hosting provider!
They will provide you with your domain, i.e., your web address, as well as the web hosting, the server on which you will install WordPress. The provision of both will cost you a small amount each month – this is essential, but also affordable.
There are plenty of web hosting providers on the internet, so you can compare prices at your leisure. So, choose your favorite, log in there, create your own user account and select the appropriate hosting package.
Next, select the domain you have chosen already. Assuming you want to create a website for recipes, this domain could be www.mycookbook.com! As soon as you have entered the domain, the availability is automatically checked by your web hosting provider. If it’s available, it will be assigned to your account after you have entered your personal details and ordered your hosting package.
Finally, you will automatically receive your access data for your web server from your provider. Save it well, because we will need it later for the installation!

When it comes to installing WordPress, you can choose one of two ways: Install it manually or via a WordPress hoster.
As WordPress has been on the market for a very long time, many web agencies have specialized in the CMS and are certified as WordPress hosters. If you opt for a WordPress host, you will need to spend a bit of money. But the hoster also takes a lot of work off your hands! Optionally, you can even book the complete package so that WordPress takes care of your domain, your web space and the hosting in one package.
As WordPress hosters, we would recommend Ionos, All-Inkl, Hostenrope and Alfa Hosting. The installation process is similar for all of them. You will receive access to your customer area, where you can configure WordPress with a 1-click installation and by entering your domain. Finally, you then just need to create the login data for your back end.
Are you raising an eyebrow at these concise instructions that are still unfamiliar to you? You don’t have to – every hosting provider offers a step-by-step installation guide that you can use to help you with this!
Your website is your homepage and, ideally, has many individual landing pages. These are the individual pages on various topics on which your users “land”. In the case of www.mycookbook.com, this would be a landing page on the topic of vegetarianism.
To create such a landing page, click on PAGES in the navigation on the left and then on CREATE at the top to add a new page.
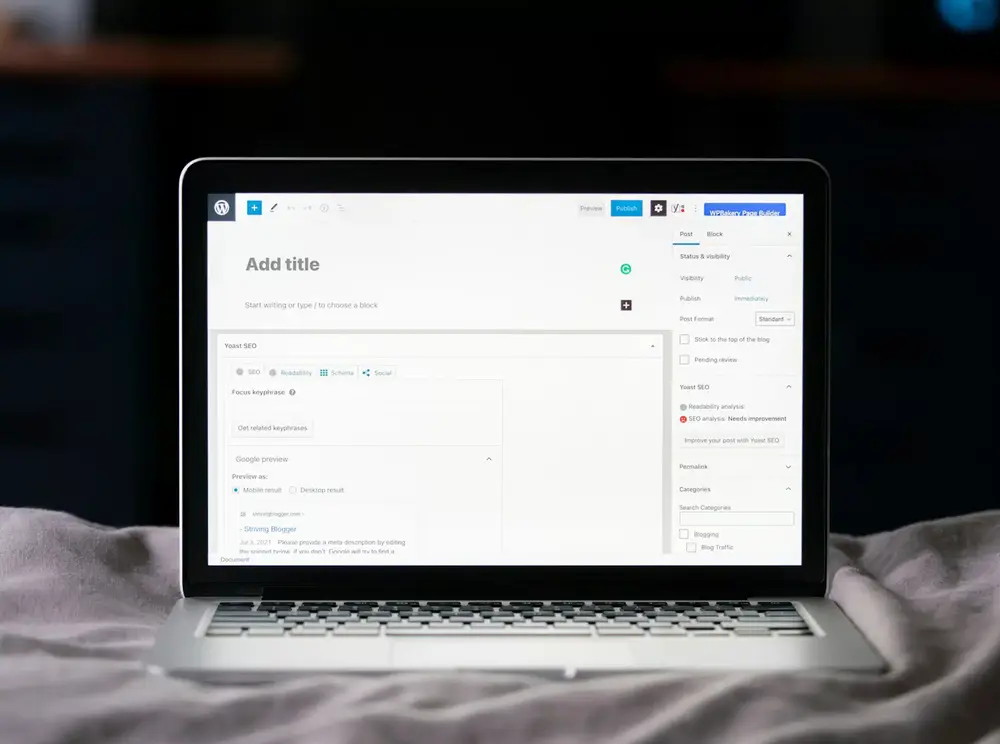
When we talk about page creation in WordPress, we automatically refer to the Gutenberg editor, as this is a pre-installed feature of WordPress for creating a page. Named after Johannes Gutenberg, the “father of printing”, the editor is there to format your texts.
You simply write your content in the editor and can format it using the editor’s many functions: from setting headlines and adding links to integrating images.
By the way, inserting images is child’s play in the Gutenberg editor. You can upload images directly from your PC or select images that you have previously uploaded to your media library under MEDIA.
Click on the + symbol in the Gutenberg editor and then select the IMAGE feature. A window will open where you can select your media library, for example, and select the previously uploaded image. As soon as it is placed, you can also define the image settings.
In addition to the image size, you can also add an alternative text (alt text) to your image. In this field, enter a detailed description of the image and the subject matter. If you have just inserted a photo of a dish for your vegetarian landing page, you could title it “Vegetarian dish from ‘My Cookbook for you to try”.
This description is fundamentally important for search engines. Google & co. can already do an incredible amount, but they can’t read images. This is why you need to fill the alt text so that the search engine can better recognize your image and rank your website accordingly.
As soon as you have finished designing your page in the Gutenberg editor, click on PUBLISH on the right. Now your site is online. But it’s still not yet findable on your website for your users. You must therefore add them to the navigation menu!
To do this, click on DESIGN on the left in the navigation page of your back end and then on MENUS. If you think back to the importance of your structure, it is a well-organized menu above all that makes your website attractive.
As soon as you are in the MENU setting, enter an appropriate name for it and click CREATE MENU. You can then add the relevant pages to the menu and also select the position in which they should appear in the navigation.
You are keen on getting going with the structure and want to start directly with your navigation menu, but can’t find the MENUS setting? Don’t panic – if this is the case you are using WordPress version 5.9 or higher.
As of update 5.9, the content management system probably thought “a few new features can’t hurt” and changed the navigation to blocks with Gutenberg.
In concrete terms: You now have to click on EDITOR instead of MENUS under DESIGN. The header template then opens in the Gutenberg editor. There you can customize the design of the website header directly.
To make changes, simply click in the menu. You can also create a different navigation menu under SELECT MENU. Click on MANAGE MENU to edit the existing navigation menu.
Did you know that you can not only create landing pages via WordPress, but also integrate a blog into the website? It’s easy, because WordPress was initially developed as a blog concept and that’s how it became famous!
But be careful – for the perfect blog design, do not use the PAGES feature, but POSTS.
While PAGES are available for the construction of static pages such as landing pages, POSTS can be used for the placement of articles in your blog. So, if you would like to write a blog post or even an entire guide about a specific recipe on www.mycookbook.com, you can do this under POSTS. Each post is given a date by WordPress so that the individual posts are displayed one after the other.
As you can see, blog articles are contributions on a wide variety of topics. Static pages, on the other hand, can be a page about yourself, a specific product or legal information.
At this point of the journey through the WordPress world, you may be asking yourself: “Are we there yet?”. Yes, we know, you want to get started, fill your website with content and click the “Online” button. But you’ll have to be patient, because we still need to give you information about the most important settings! Come with us, we will guide you step by step.
If you are creating a website with WordPress, you need to know that it is the software that configures your start page. That’s why you have to do it again yourself, especially if you embed blog posts. It is then advisable to set a static page as the homepage, as otherwise the articles from your blog will be displayed as the homepage by default.
But don’t worry, this can be easily fixed: Go to SETTINGS in the left-hand navigation bar and then to READ. You must then select the option ONE STATIC PAGE and define your homepage under HOMEPAGE.
Once the homepage has been technically defined, you must give your baby an individual name so that you can be found in the search engines.
For this step, stay under the SETTINGS tab and click on GENERAL. You can change your title and subtitle there. Your title describes the name of your website, while the subtitle can be your slogan in short words.
How about www.mycookbook.com, for example:
Title – My Cookbook
Subtitle – Learn how to cook properly
Sounds promising, doesn’t it?
We know it – nowadays users like to comment a lot online. You can also do this with WordPress for your blog and add opinions and feedback to your posts. However, it is up to you to decide whether you want this on your website.
If you agree that website visitors can comment on your posts, you must check the box “Allow people to post comments on new articles” under SETTINGS and then DISCUSSIONS. If this is already preset, but you do not want to offer a comment column under your posts, you can deactivate it by simply unchecking the box.
What you need to know: Some themes in Word Press feature a sidebar on the left or right. However, you can customize the information about your content that is displayed there by clicking on DESIGN and then WIDGETS.
This setting has not stopped with the WordPress innovations though, so you can also configure the widgets in the Gutenberg editor from version 5.8.
You can also remove the widgets in the editor. To do this, select the widget, then click on SELECT GROUP by clicking on the two overlapping rectangles and pressing the DEL key on your keyboard. If you want to add new content to your widget, simply click on the + symbol!
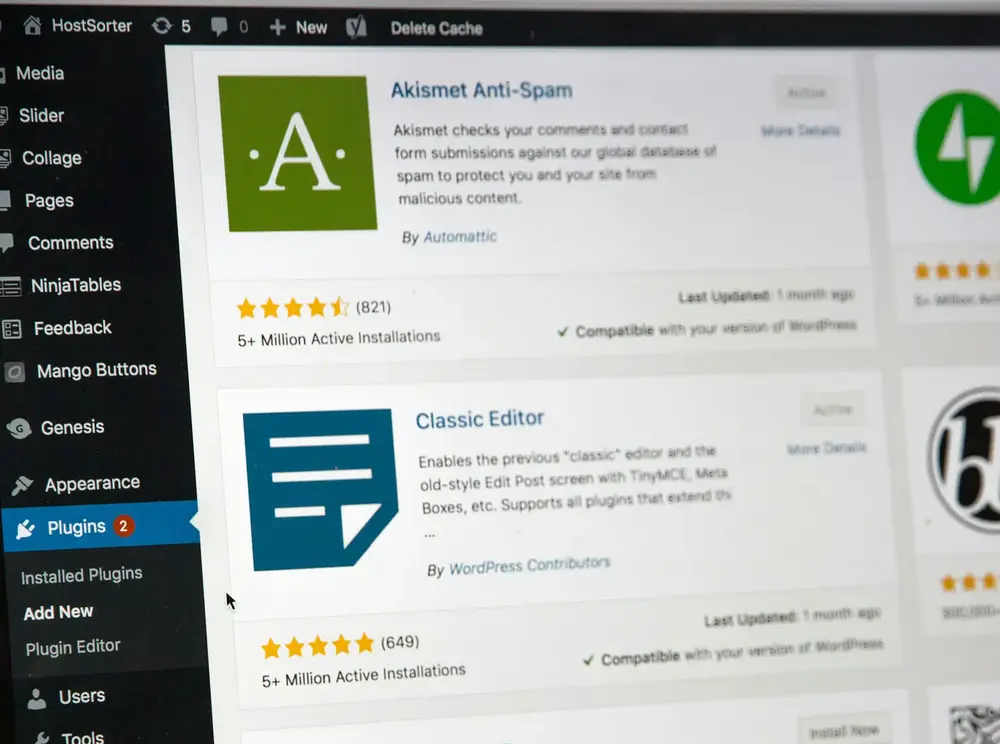
At the very beginning, we talked about the many functions that are available in WordPress. Many of these features are already pre-installed in every WordPress theme. However, you can extend these standard functions as you wish with the help of plugins and thus equip your website with everything you need technically.
Installing plugins is similar to downloading apps on your smartphone. So, if you want a specific function, you can easily install it as a plugin. For example, a plugin for the integration of image galleries or a contact form, for newsletter registration or for search engine optimization.
It is absolutely essential that you only choose plugins from reputable third-party providers. You can judge this on the basis of evaluations. We would also advise you to only install plugins that you really need and, if necessary, to regularly clean up your back end so as not to overload your storage space.
You can find an overview of all installed plugins by clicking on the PLUGINS menu item in your left-hand navigation bar in the back end. If you want to add plugins, click on the INSTALL menu sub-item. This will take you to the plugin store. In the top search bar, you can search for the functions that the plugin should provide or enter them directly by name.
Once you have made your choice, all you have to do is click on the INSTALL button. You will then find it on the overview page.
Please note that installing your plugin is not the end of the story. You must then activate it by clicking on ACTIVATE below it.
That’s it, you’ve made it – we’ve reached the end of our tutorial and you’re no longer a beginner and can now create a WordPress website. As you can see, there are many small steps, but they will all lead you to a website that you can be satisfied with.
WordPress themes, premium themes, plugins, a community of professional people – the package you get with wordpress.com is a huge advantage over other content management systems. With WordPress, you can easily create your site under your desired domain and broadcast your content to the world.
As with all digital projects, it is always better to bring a certain amount of know-how with you. But this really isn’t necessary with WordPress. Some steps may take a little longer, but we can guarantee you this: You only need a little input from outside, something like this blog post, to get helpful tips. If you have any questions, you can turn to the community and over time you will learn so much that you will become a WordPress pro yourself.





With us, you have one partner for all your digital needs. From strategy and consulting to development, marketing and ongoing support, we help you build, connect and optimise your digital systems. We work with you from the initial idea through implementation and beyond, supporting your digital transformation every step of the way.


codafish ><> your digital agency
+1 888 9263234
hello@codafish.netFeel free to contact us for a free initial consultation. We’d be happy to hear from you!
The data provided will be transmitted in encrypted form and treated in accordance with the data protection law. You can find our data protection information here.







Fast, secure and easy to manage – we build WordPress sites that grow with your business.
From setup to long-term support – one partner.